


Keurig K-Mini Coffee Maker, Single Serve K-Cup Pod Coffee Brewer, 6 to 12 oz. Brew Sizes, Black Import To Shop ×Product
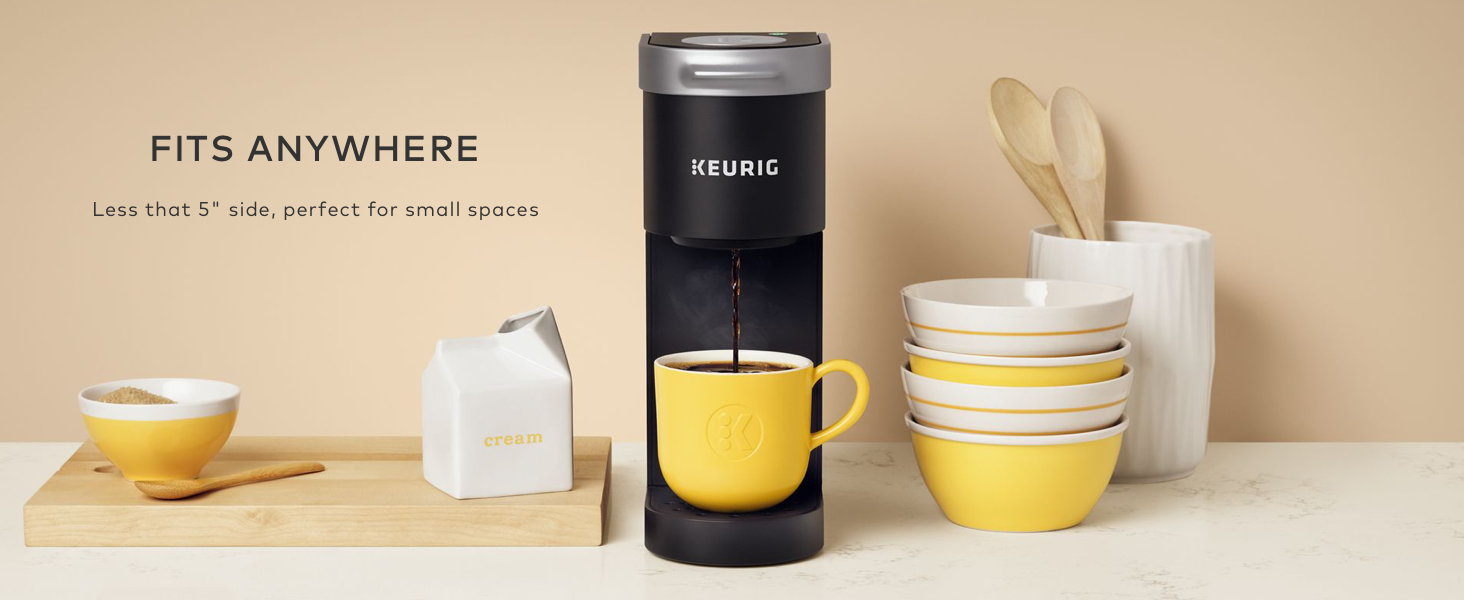
- FITS ANYWHERE: Less than 5 inches wide, perfect for small spaces
- YOUR PERFECT AMOUNT: Brew any cup size between 6-12oz with Keurig K-Cup pods
- ONE CUP RESERVOIR: Just add fresh water for each brew
- FAST & FRESH BREWED: Coffee made in minutes
- CORD STORAGE: For easy transport and tidy countertops
- TRAVEL MUG FRIENDLY: Removable drip tray accommodates travel mugs up to 7.0 inches tall and holds a full accidental brew for easy cleanup
- ENERGY EFFICIENT: Auto off feature turns off your coffee maker 90 seconds after your last brew, helping to save energy
- COMPATIBLE WITH THE MY K-CUP UNIVERSAL REUSABLE COFFEE FILTER: Brew your own ground coffee (sold separately)
- INCLUDED IN THE BOX: Keurig K-Mini single serve coffee maker
- MATTE FINISH: Sleek simplicity meets modern style the K-Mini coffee maker is available in a variety of matte-finish colors
$50
The Keurig K-Mini single serve coffee maker features a sleek design with matte finish, and at less than 5 inches wide is the perfect size for any space or occasion. The K-Mini brewer is effortlessly simple to use – just add fresh water to the reservoir, pop in your favorite K-Cup pod, press the brew button and enjoy fresh brewed, delicious coffee in minutes. Choose from hundreds of delicious K-Cup pod varieties to enjoy 6-12oz of your favorite coffee, tea, cocoa, and iced beverages. With a single cup reservoir and cord storage, the K-Mini coffee maker is the portable brewer that makes anywhere perfect for great coffee. The K-Mini coffee maker is available in a variety of matte-finish colors.
From the manufacturer

Specification: Keurig K-Mini Coffee Maker, Single Serve K-Cup Pod Coffee Brewer, 6 to 12 oz. Brew Sizes, Black Import To Shop ×Product
|
||||||||||||||||||||||||||||||||||||||||||||||
| Dimensions | ||||||||||||||||||||||||||||||||||||||||||||||
|---|---|---|---|---|---|---|---|---|---|---|---|---|---|---|---|---|---|---|---|---|---|---|---|---|---|---|---|---|---|---|---|---|---|---|---|---|---|---|---|---|---|---|---|---|---|---|
|
||||||||||||||||||||||||||||||||||||||||||||||
9 reviews for Keurig K-Mini Coffee Maker, Single Serve K-Cup Pod Coffee Brewer, 6 to 12 oz. Brew Sizes, Black Import To Shop ×Product
Add a review
Related Products

OXO Good Grips Nylon Potato Masher for Non-Stick Cookware,Black,1 EA Import To Shop ×Product customization General Description
- Camera: -
- Flight time (m): -

Farberware Professional Heat Resistant Nylon Meat and Potato Masher, Safe for Non-Stick Cookware, 10-Inch, Black Import To Shop
- Camera: -
- Flight time (m): -

OXO Good Grips 4-Piece Nylon Tool Set Import To Shop ×Product customization General Description Gallery Reviews Variations
- Camera: -
- Flight time (m): -

rubyslippers46 –
READ THE INSTRUCTIONSOkay. So late last night I decided to order this smaller version of the Keurig Coffee Maker, because I’m short on counter space and I only make one cup of coffee a day anyhow. My new machine was on my front porch this afternoon. (Shop, select, pay, receive. The good, the bad, and the ugly.) Anyhow, I’ve decided to post a few photos and try to write an informative, helpful review, as I see there are some pretty negative, frustrated buyers of this product, and several questions listed that indicate those buyers did not do the very first thing they should have: READ THE LITTLE INSTRUCTION BOOKLET. Now, I must say, these few instructions could have been written a bit more clearly—but that’s par for the course these days, as practically nothing is made by English speaking people, so the instructions are someone else’s idea of the English language. So, I’ve posted some photos to aid in my attempt to make these instructions more “user friendly.”Before I forget, I do have two negative comments on this product (aside from the less-than-clear instruction booklet): The first is that I feel it’s overpriced for what it is. I paid $83+ (including tax) for a little plastic gizmo that should sell for about half that. If it lasts as long as my “big boy” Keurig, which is at least five, maybe six years old, I suppose it’ll be worth it. The second issue is the cord. I do love the idea of the cord compartment … however, the cord that comes with this machine is only about 18” long. (The cord compartment would have been a lot more useful with the big boy machine, which has a considerably longer cord.) As I don’t even need the full 18”, I stuffed some of the cord back in the compartment, then found that I’d shortened it more than I wanted, but when I tried to pull out a bit longer cord, I could only get another inch or so. Now I have about a 14” cord … which I can work with, but some people might find that they’ll need a longer cord, so I thought I’d mention it.As you can see from my first photo, the big boy Keurig is considerably larger than this new one (which measures 4.5” wide by 10 3/4” deep, the same depth as the big boy). Another photo shows a closeup of the side of the little clear plastic compartment (referred to in the instruction booklet as the “water reservoir”), which shows the amount of water—how many ounces—is being put into the water reservoir. You must put AT LEAST the minimum of 6 oz, or up to the MAXIMUM of 12 oz. This question of how much water to put in seems to have befuddled many purchasers: I cannot understand why. So long as it’s between the low water mark (6 oz) and the max water mark (12 oz), you’re good to go. HOWEVER MUCH WATER YOU PUT IN, IS THE SAME AMOUNT OF COFFEE THAT WILL POUR INTO YOUR CUP. Maybe it’s more easily understood this way: Use your coffee cup—whether it holds 6 oz or anywhere in between six and a maximum of 12 oz (my red and white cup that you see in one of my photos holds 8 oz, allowing about 1/2” to the very rim) to fill the water reservoir—and you’ll get that same amount of coffee in your cup. An 8 oz cup of coffee, using a coffee pod, makes (for me—I drink it black) a perfect, medium-strong cup of coffee.Now, how to use your new machine: FIRST, as I said, READ THE INSTRUCTIONS. The very first words printed in the booklet are, “Before You Brew.” You’re first going to make a cup of boiling water only—then your machine is “prepped” and ready to go. So, plug it in, then push the “Power Button.” (See my 2nd photo—the power button is that tiny dot at about the 1 o’clock position from the big, round, silver-colored circle with the big K in the center of it. That silver-colored circle is what is called the “Brew Button.”) When you press the Power Button (the little dot), after you’ve plugged in the machine, that dot will illuminate. Next, you lift the cover of the water reservoir, fill your coffee cup/mug with water and pour that water into the reservoir. (Check the measure on the side, to be sure you have somewhere between 6 oz and 12 oz in the reservoir.) Then lower the water reservoir lid and place your coffee cup on the drip tray.Now, you’re going to lift and lower the handle where you would put a coffee pod—EXCEPT THIS FIRST TIME you’re not going to put in a pod, because you’re only going to make a cup of hot water, just to run some water through the machine to prep it.Now that you have your water in the water reservoir, and your cup on the drip tray, and the “coffee pod compartment” handle has been lifted and lowered, you’re ready to “push the Brew Button.” Remember, the Brew Button is the big silver-colored circle. It depresses. I finally figured out that I had to hold it down with three fingers (I have small hands) for 2 or 3 seconds … and then the “Brew Indicator Light” (a rainbow shape just above the Brew Button—see photo four) will “illuminate solid, then begin to pulse while the water is heating.” It will take a minute or so for the water to heat … during which time the “rainbow-shaped” light will come on and fade, come on and fade, several times (what the booklet calls “pulsing”). Eventually, that Brew Indicator Light will stay solidly lit, and then the hot water will begin to pour into your cup. When that’s done, toss that water out, and you’re ready to make your first cup of coffee. Repeat all the steps, except this time, of course, insert a coffee pod before lowering the handle.In summation, I don’t think it takes any longer to make one cup of coffee in this new single serve Keurig than it did in my larger water capacity model. Yes, you do have to put water in it each time and you do have to wait for that water to heat up … but I had to wait a longer time for more water to heat up in my big Keurig. And the amount of time it takes for the coffee to pour into your cup is the same as in the larger model machine—also, the sound is about the same, not loud enough to wake anyone up in another room.I like the extra space on my counter, and if this machine holds up as well as the other one, I think I’ll be happy with it. I do see some reviews that state their machines didn’t work after a short while … if that’s the case with this one, I’ll be writing an update on my review.
GBarrington –
An odd device if you ask me. But I kind of like it.Like most Keurig machines, it is reliable and feels well built. I bought it when my Mr. Coffee K-cup machine inexplicably started leaking. However, it IS a bit different from other Keurig & Keurig compatible devices I’ve had/used. And oddly, my Mr. Coffee device has mysteriously ‘healed’ itself. I don’t know if it is a product failure, or a user failure!For one thing the Keurig is significantly slower to brew. With most machines like this, you pour the water into the reservoir, put a capsule in place, push a button and it starts brewing. It heats the water as it is pushed through the device.With this machine, you pour the water into the reservoir, put a capsule in place and push a button. At this point, the operation differs a bit from my previous experience. The water in the reservoir is emptied into an internal reservoir, where the entire amount is heated at the same time before it pushes the water through to the receiving cup.It does add one to two minutes to the overall brew time. However, I DO think the water temperature seems more consistently hot than with other devices. I suspect this is an effort to improve brew consistency.It’s very skinny and takes up MUCH less countertop space than my previous devices.I got the grey color, and I’m sorry I did. The cabinet is dull and while it clearly is not cheap plastic, it does look cheap in my eyes. To be fair, when I touch the machine, it is clearly not cheap, but the visual detracts from the overall effect.I’d buy it again, but I do think I’d have tried a different color.
Gary T. Czerwinski –
It has a learning curve …I’m a senior, so I don’t make much coffee. When I saw this on sale, I grabbed it. I’ve had a few weeks and I just now getting used to it. The directions as written are confusing, but I finally figured it out. You have to open the main lid TWICE for it to work properly. First, add your water. Next, simply open the main lid (do NOT add your coffee). Now, just close the lid. It will not seal completely, that’s okay. Bring down handle. The light shaped like a bow will come on and begin to blink. That means it is heating up the coils. It takes about a minute. When the light stops blinking, for the SECOND time open the main lid and now insert your coffee tab, pushing it down to break seal. Now close the lid. Again, it will not completely seal. Bring down handle. Now just push the large silver button. The water will exit the reservoir to heat up and your coffee will drip into the cup. Makes a perfect cup of coffee!
***Phoenix*** –
Works well, short power cord thoughI bought this keurig machine so that I could make myself coffee at work. I typically bring in a couple insulated mugs full of coffee, but unexpected long hours can having me craving a fresh cup. I work in a pottery studio, where dust is a major concern for anything that I bring in. This system is completely closed when not in use, so nothing can get inside. I just need to periodically keep it wiped down. While I’m not a big fan of the pod system and the waste it generates, it is a good option for my situation. I wouldn’t buy this for home, but for work, it convenient and clean. I fill my mug with water, dump it in the reservoir and that exact amount of coffee brews from the single cup. A 12 oz mug is an acceptable strength for my liking, not too watered down. The coffee is sufficiently hot for my liking. I haven’t measured the temperature of the water, but I don’t think it would be hot enough to make tea how I like. Probably fine temperature for a cup of ramen. The only thing that I find inconvenient about this machine is its extremely short power cord, only about 2 1/2 feet. I have to set this on a chair near an outlet to be able to reach it. Perhaps it is fine on a counter, where outlets are more close and accessible. One last note, I bought this from the warehouse at a discount and the machine is like new, just not in the original packaging.
Kevin Amatt –
Waist of moneyNo coffee for me. This machine just leaks water. Apparently a lot of people have issues with this model.Amazon said they will refund all my money.
Delia S. –
Pink funcional, buen tamaño y color.Funciona bien, antes de comprar, pregunté si le quedaban cápsulas Dolce Gusto, me indicaron que si, e hice el intento, y si se puede, debes perforar con un destapacorcho la parte de abajo de la cápsula, un pequeño hoyo, para que pase bien el agua por la cápsula. Por ejemplo yo usé Te Chai, se usan dos cápsulas, entonces, pongo 6oz de agua primero y la 1era cápsula, y vuelvo a poner otras 6oz de agua, y la 2da cápsula, y funciona bien. Para cualquier bebida, recuerda como mínimo, poner 6 oz de agua, sino, no funciona la máquina. Esta super bien empacada, llega con cajas super bonitas y originales. Por aparte, compré dos compartimentos, para colocar las cápsulas. Y, estoy contenta, me gusta mucho el color y el tamaño.
Patricia M. –
Don’t buy this machine. Waste of moneyGreat for a small places, BUT takes forever to warm up. Does not take two minutes like the directions say. Far too much money to pay for something that doesn’t do the job. Wish I could have returned it. I regret buying it.
Denise –
Adorable & FunctionalI fell in love with this pink but it’s near impossible to find in CA in store. I like that you have to refill the water every time, keeps the water fresh. It does drip a lot after brewing, but it’s easy to clean with water and paper towel or a cloth. Works with reusable & regular K-pods. I purchased a 4 pack of reusable pods for less than the price of the Keurig branded reusable pod. Fits great on top of my mini fridge. You’re able to purchase space saving K-pod holders for the side here on Amazon as well.
Mario Sagarrica –
Not recommended.Mine stopped working after 3 months… stopped brewing coffee… contacted the company to see what to do. Also very messy machine… coffee splashes everywhere… my husband hates it. The only cute thing about it is the colour. Otherwise, overpriced item and takes long for coffee machine to warm up.